






This page teaches you how to integrate your email server inboxes into the CommBox system.
This feature allows all the emails from your end customers to be consolidated at the same location. From there, they will be assigned to agents and handled in a streamlined, efficient manner.
Installation
1. Click on the Settings icon on the lower-left side of the screen.
2. Choose the Email module icon from the channels list. Here you can see the active and inactive channels:
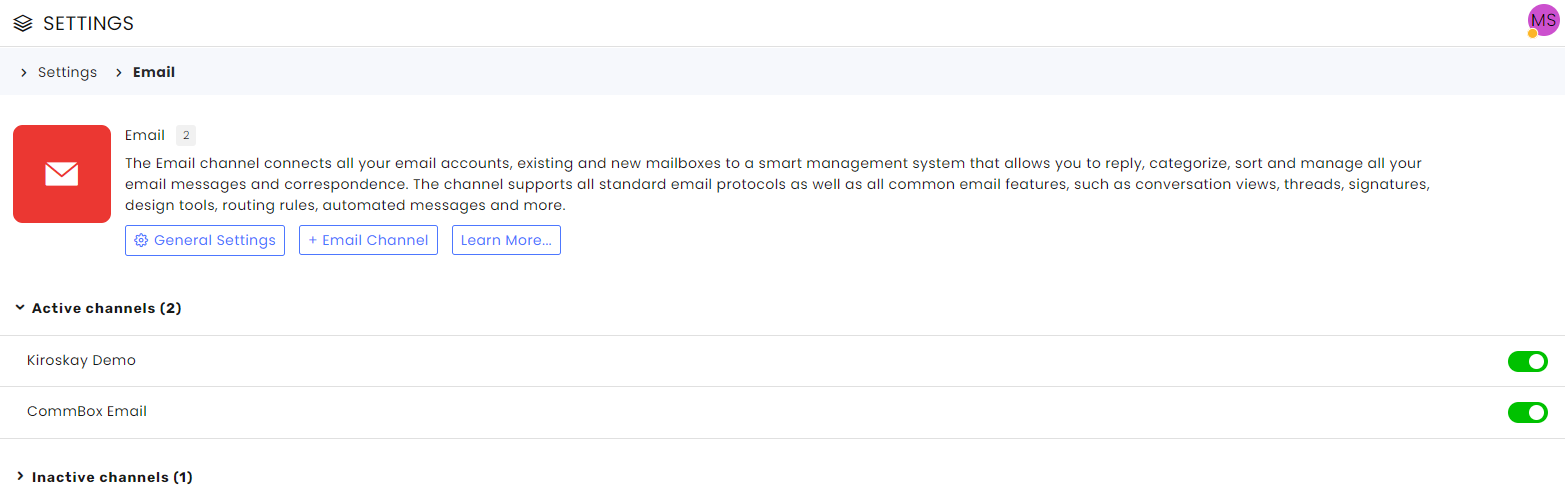
3. Click on +Email Channel:

4. Type in the Channel Name
5. Sub-Channel - For example, you could assign all tickets that arrive from your support email address to any one group of agents, by choosing the groups listed under Assign to Group. This will be helpful when you set up multiple mailboxes in your helpdesk. Alternatively, you can make use of Ticket creation automation rules to auto-route tickets to specific groups as well.
6. Choose the email system - an email address that serves as the incoming and outgoing email address.
Gmail and Outlook Guides:
- Microsoft Outlook - click how to setup your Outlook email
- Gmail - click how to setup your Gmail
Forwarding Address Setup
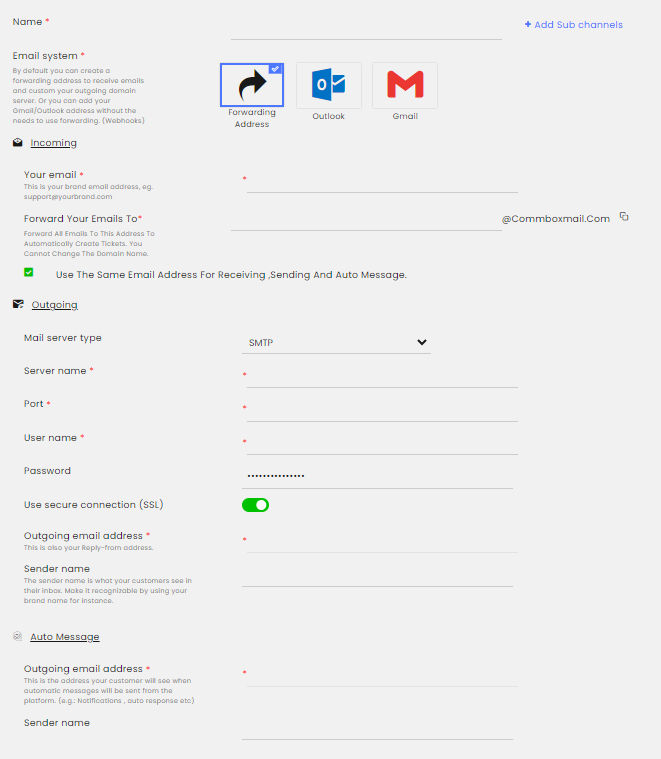
Incoming
Your email - this is your original email address., Eg. [email protected]
Forwarding your emails to - Forward all emails to this address to automatically create tickets. You cannot change the domain name.
If you want one email address to be used for both incoming and outgoing emails, mark the checkbox or you can override it, making each task use a different email address.
Outgoing
In Sending emails you can choose your email server type. There are several options:
1. SMTP - Simple Mail Transfer Protocol
You will need to input the following details:
a. Server name
b. Port
c. Username
d. Password
e. Secure connection
2. Exchange Web Service
You will need to input the following details:
a. Server name
b. Username
c. Password
d. Exchange Version
3. Use Custom Domain
In order to make a Custom Domain, you need to go to the Email Module Settings and select Add Domain.
You will need to request this from the system administrator to authorize this.
The Domain names for the outgoing email will be drawn from the Approved Domain Name.
4. Using CommBox’s email domain name
If you don't want to use a pre-existing domain name, you can choose to useCommBox's domain name. For this option, you will only need to input the outgoing & auto-message email address.
 Note: Of all four options, you are required to set the outgoing email address and the sender name.
Additionally, you will only be able to manually enter the outgoing email address if the checkbox is not ticked.
Auto-Messages
The outgoing email address and sender name will be displayed to recipients of automated email notifications which are sent by the Agent Workspace system.
Verifying Your Email Address
The next step is to verify your email address. This is the most critical step. Make sure you are verifying your email before you start forwarding messages .