


CommBox enables you to reach out to a broad audience using WhatsApp campaigns.
What Is a Campaign?
A campaign allows you to send WhatsApp messages to thousands of end customers (subject to WhatsApp limitations).
Customer Distribution in a Campaign
In a campaign, you can communicate with a wide distribution— not just a single conversation, but a conversation with a broad customer distribution.
The distribution option will be open after users are granted permission and will be carried out through the Compose window.
How to Create a WhatsApp Campaign
1. From the homepage, click the Create a New Conversation icon on the upper left-hand side of the Main Toolbar.
2. Once arriving at the New Conversation window, click the WhatsApp icon from the Conversation options:

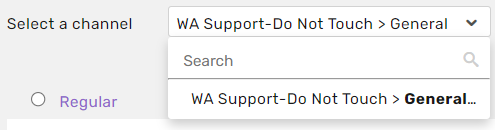
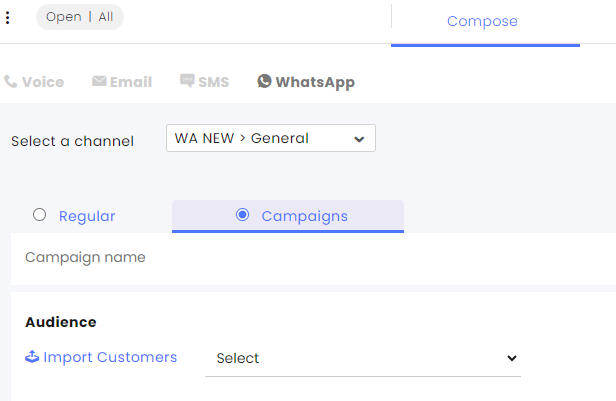
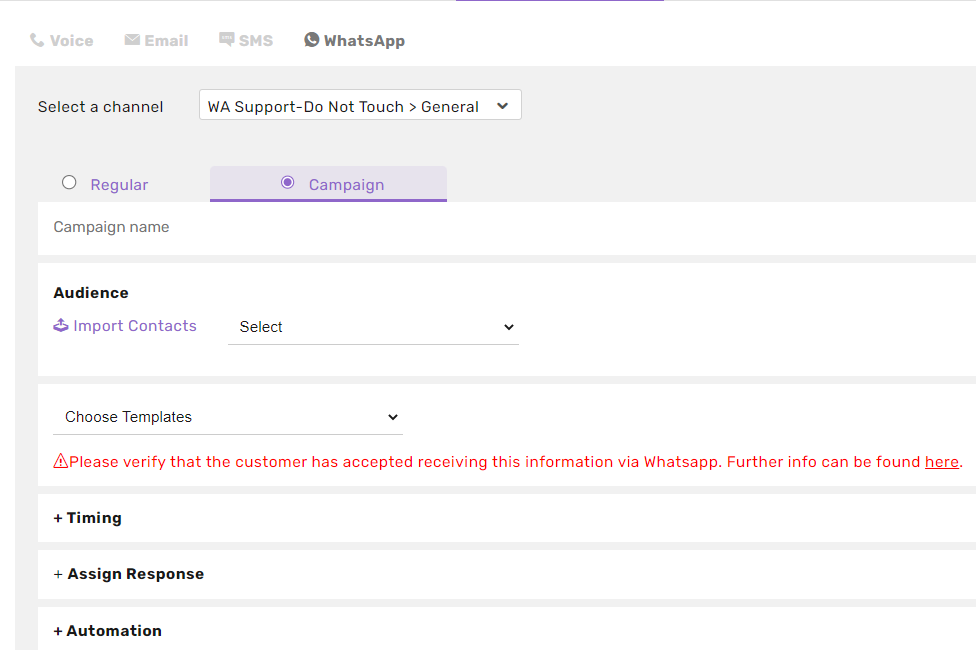
3. Then select the relevant channel you wish to base the Campaign from.
4. Mark the Campaign checkbox.
Viewing Campaigns Data
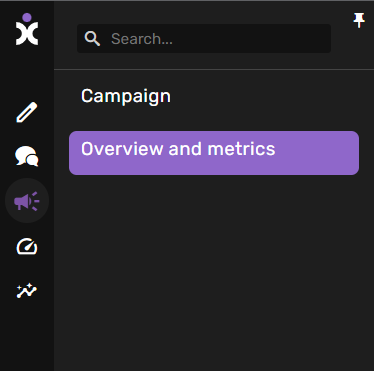
Campaigns can only be viewed in the “Campaigns” option in the megaphone icon in the main side menu.
Now you will have reached the main area of the Campaign Creation interface.
From here, you can fill in all of the details required to run the campaign:
Campaign name – the name by which the campaign will be known and visible from the Campaign Overview window
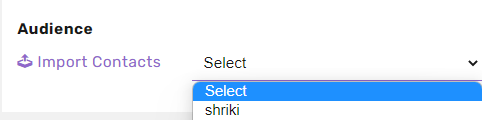
Audience – the customers who will be targeted by the messages disbursed by the campaign.
To input the contact details of the intended audience of customers, you will need to import a contacts list. To do this, click on the Import Contacts button (seen in purple text below)
(If you’ve already imported the list of contacts relevant, simply select it from the drop-down list displayed here and skip to the Choose Template step)
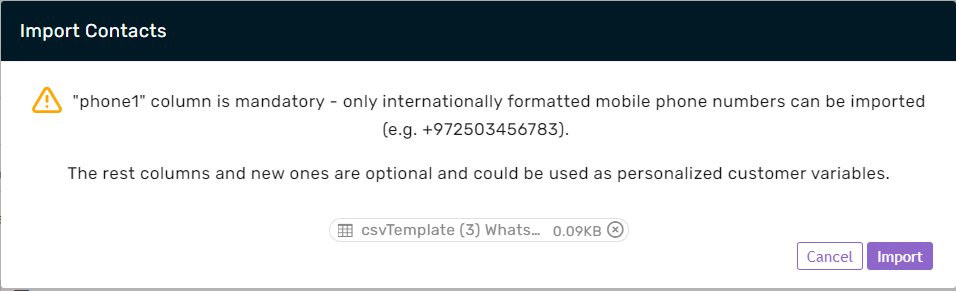
Once clicking on Import Contacts, a pop-up window will appear (as seen below).
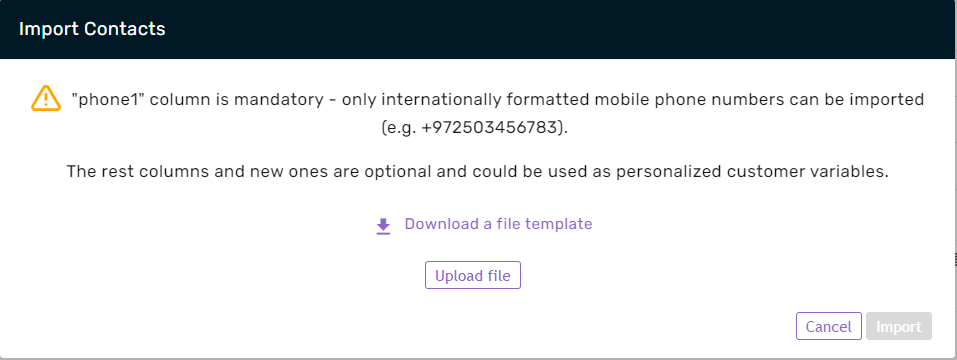
Click on Download a file template (in purple text). This will automatically download a .CSV file, appearing in the lower left corner of the screen.
You can open the file using Google Sheets or Microsoft Excel, It will appear as seen below.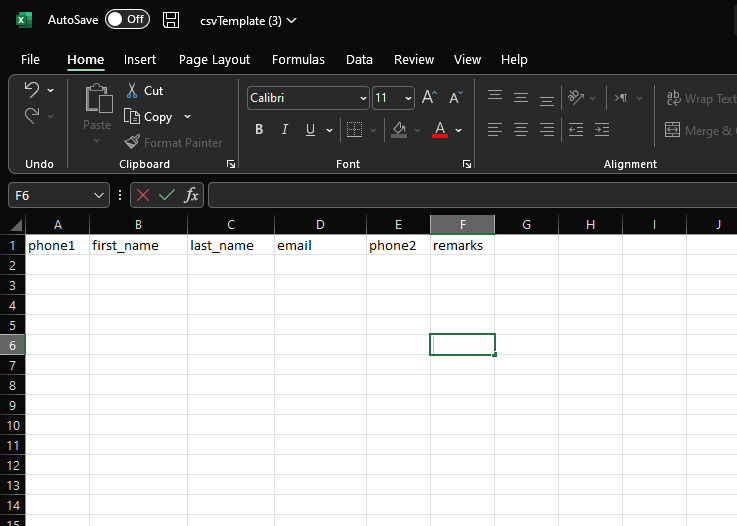
Fill in the requested information in the columns which have been pre-labeled.
Please ensure that the phone numbers entered in the phone1 column (mandatory) are typed in the full country code format.
For example, in the number +972503456783, +972 is the Israel country code.
Those are the columns that reflect the default customer details fields. If you have additional custom customer fields, and you wish to update your existing customers information or save new information with your new customers, you will need to write the “unique name” of the field on the top of the column. You can find the “Unique name” of all your custom customer fields, in the Custom Fields module.
Telephone numbers will be saved as new customers within the system. If there is additional data included such as names, emails or other existing user fields they will also be saved in the customer’s details.
Personalized Temporary Customer Information
If you choose to send a template with parameters, you can add additional columns to the file that can be used as personalized customer variables in the parameters. When uploading the .CSV file, you will need to write titles of additional columns and add the customers information under them.
Once you will upload the file you will be able to use this information only on that campaign message, this information wont be saved in the customer’s details. That can be used for temporary information such as an order ID or expiry date of a subscription plan. In the WA template section of this guide we’ll explain how to insert this information in the parameters and send it to your customers.
After filling out the relevant contact details, please make sure you Save the file in a .CSV format where it can be easily located and under a file name you will remember.
Now, return to the New Campaign creation interface.
The Import Contacts pop-up window will appear again as seen below.
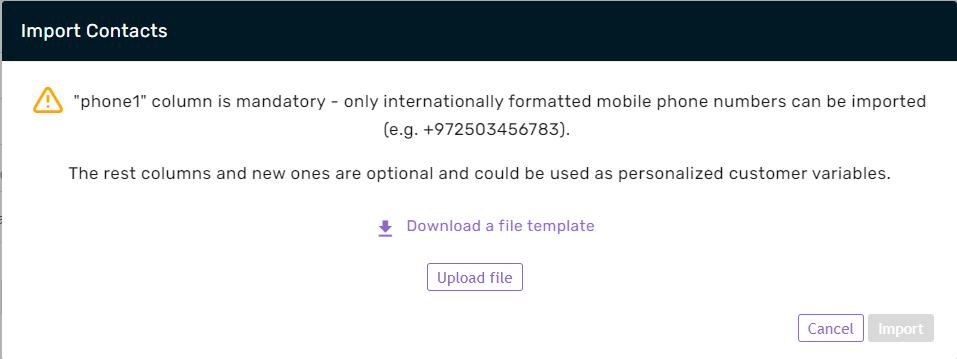
This time, click on the Upload file button (in purple text). Locate the relevant file, and click on it. One you’ve done this successfully, the pop-up will reappear as seen below.
Click on the Import button in the lower right corner.
If the import has been completed successfully, the following window will appear.
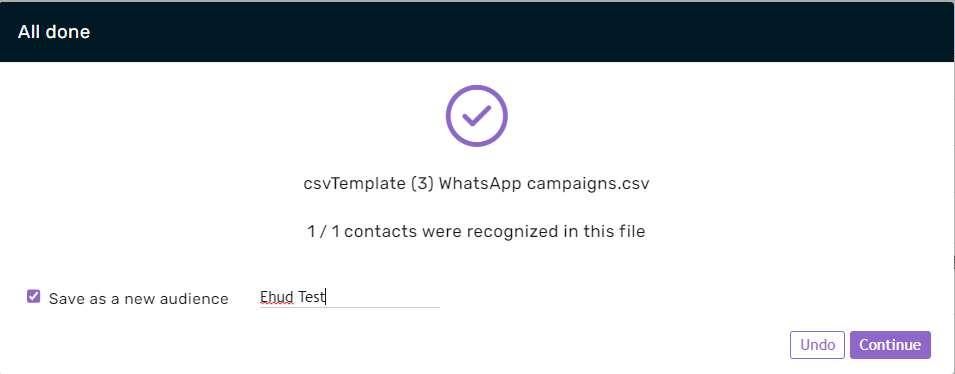
Make sure to check the box next to Save as a new audience and enter a name to label the audience.
Once you’ve done this, click on the Continue button.
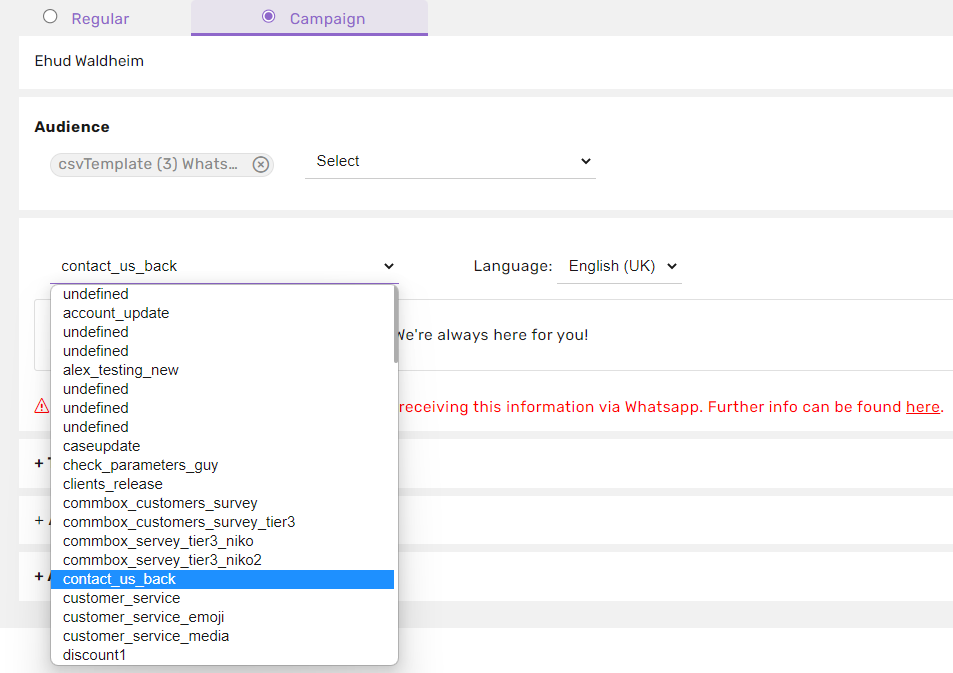
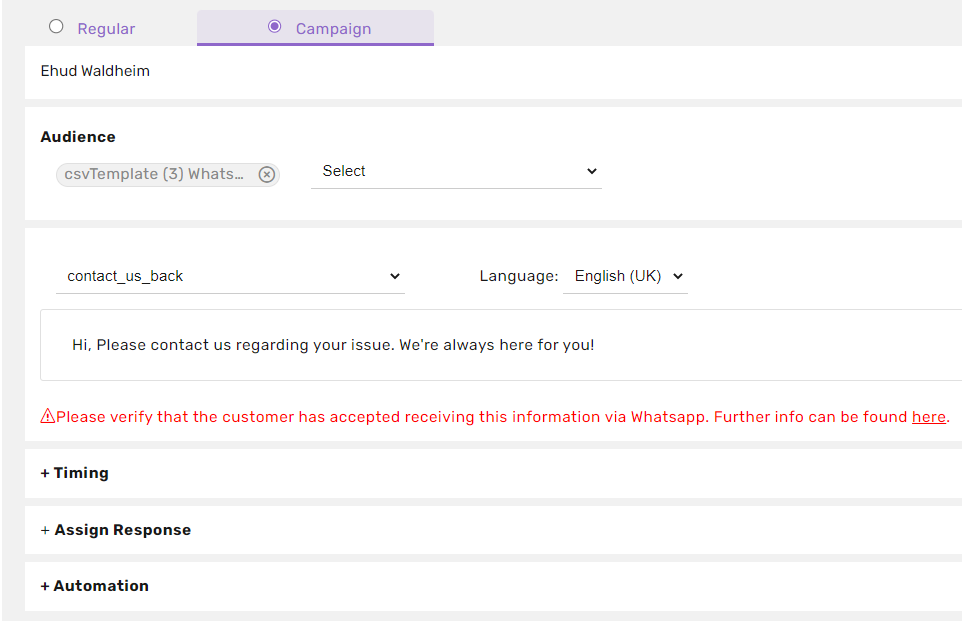
Set the Content of your Campaign
Next, Select the desired Message Template from the drop down menu.
Add Custom Variables to the Campaign Audience
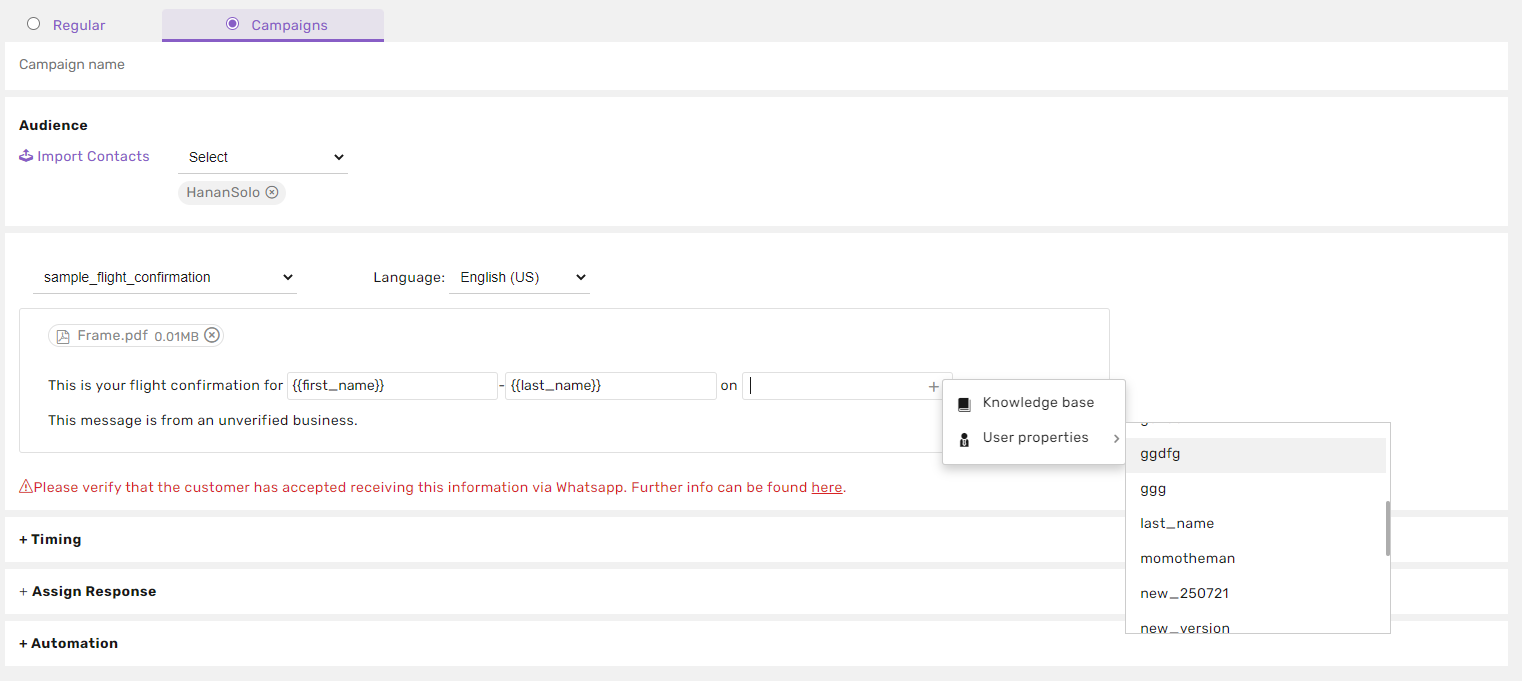
If you wish to use a template with parameters in your campaign, you can use any customer field that exists in your brand (only for existing customers) to personalize your message.
The information will be pulled from each customer information card, whether you used a pre-made audience or uploaded a .csv file, so make sure that all of your customers have information in the field you chose to insert.
You can also use temporary personalized information using additional columns in your file template (explained above).
In order to insert a customer field inside a template parameter, hover over the parameter, click on the + icon, click on user properties and then you will be able to select a customer field out of a list of all existing and temporary user fields.
Schedule the Campaign
Once you’ve selected the desired Message Template, you can set the proper Timing and Assign Responses settings.
There are 2 options for sending the Campaign:
1. Launch the campaign immediately so that it’s sent once you click on the launch campaign button.
2. Set a custom date and time for the launch.
When will the Campaign End?
The duration of the sending of the campaign depends on the amount of customers you send the campaign to, but when the sending is completed (there was an attempt to send the message to all of the desired customers) a 48 hour window will open (by default), in which responses to the campaign message will be considered as “campaign response” and will not go throw the regular flow on of a message on that channel. After that time period will be over, campaign responses will be considered as regular messages and will get in the flow of a message on that channel.
For example: if the set time frame is 3 days, and the customer replies to the campaign(s) messages after 3 days, a conversation will be opened in the system but will not be associated with the campaign.
- (Optional) You can also choose the bot script that will be linked to your Campaign so that when your customers respond to the chosen template, this specific bot will be triggered, instead of the main bot of your WhatsApp channel.
To change the default expiration time:
Click on the expiration time checkbox 
Then you will be able to set the time and date of the expiration of your campaign. What enters before the set time frame will be considered a response to the campaign.
After choosing the desired settings, click on the Create Campaign button in the lower right corner.

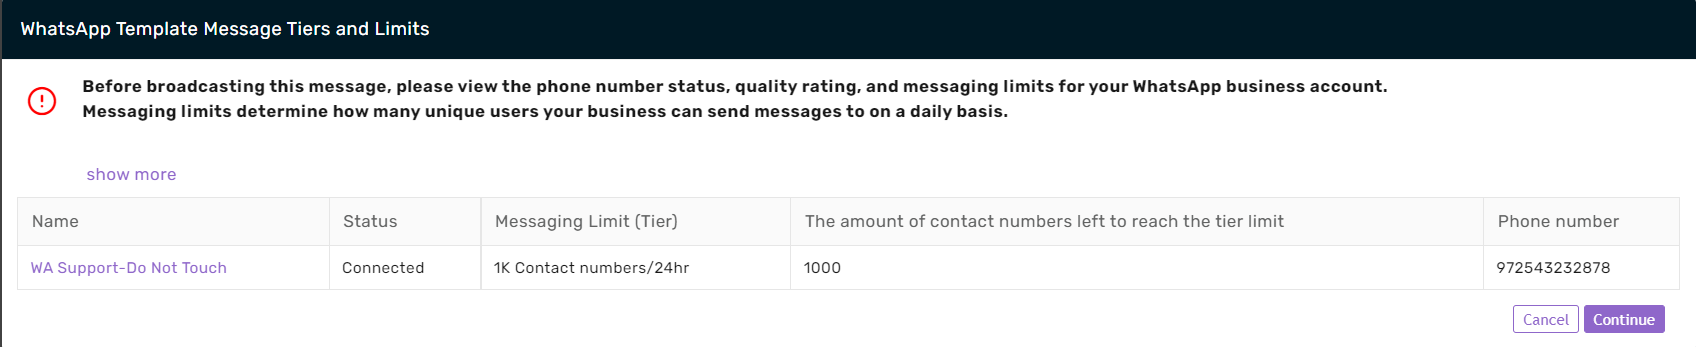
The following window will appear. Verify that your WABA status is connected and that the amount of contact numbers to reach the tier limit is more than the amount of contact you are wishing to send the campaign to. For more information about WhatsApp template message tiers and limits – https://developers.facebook.com/docs/whatsapp/messaging-limits
After verifying you are safe to launch the campaign, click on Continue.
This is the final step before the Campaign’s Launch.
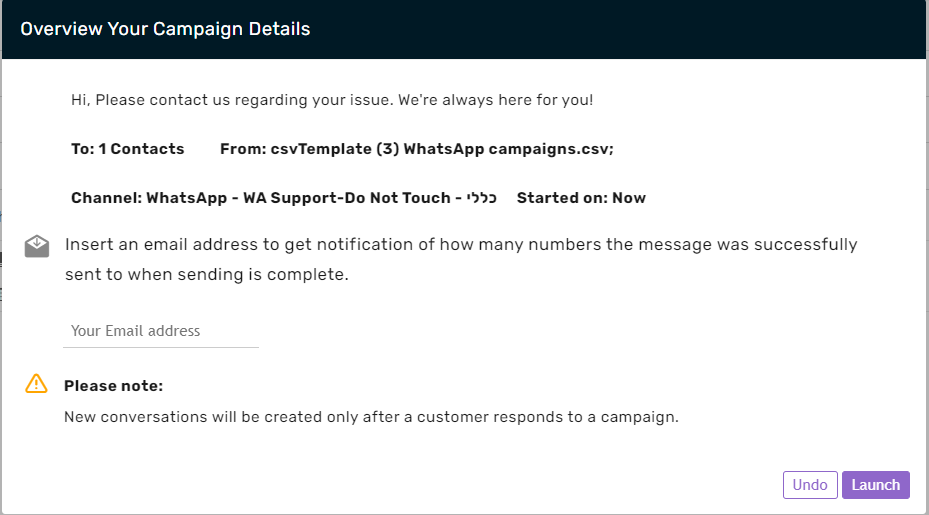
Provide an email address where you want to be notified when the campaign has been completed. After, click Launch.
The email will appear as seen in the screenshot below.
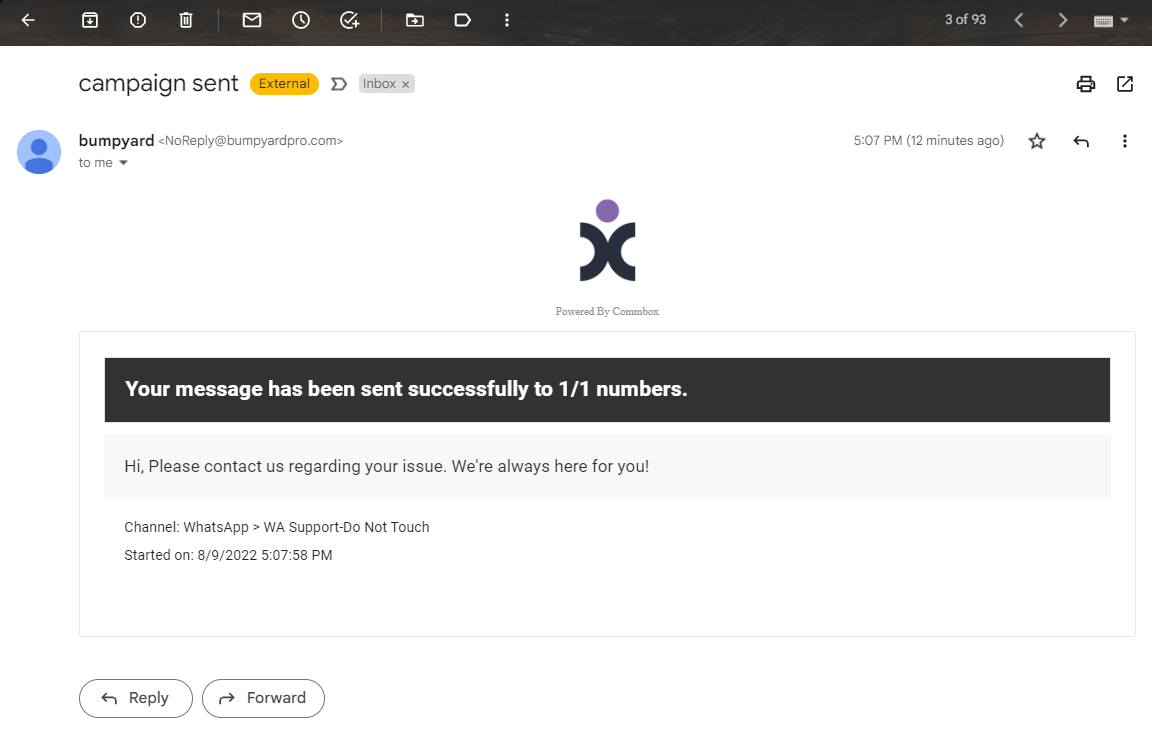
That’s it! You have now created and launched your first WhatsApp Campaign!
Campaigns Overview and Metrics
In order to check the status of the Campaign, click on the loudspeaker icon on the Main navigation menu (highlighted in purple in the screenshot below)
When you already have many existing campaigns, your Campaigns page will look like this:
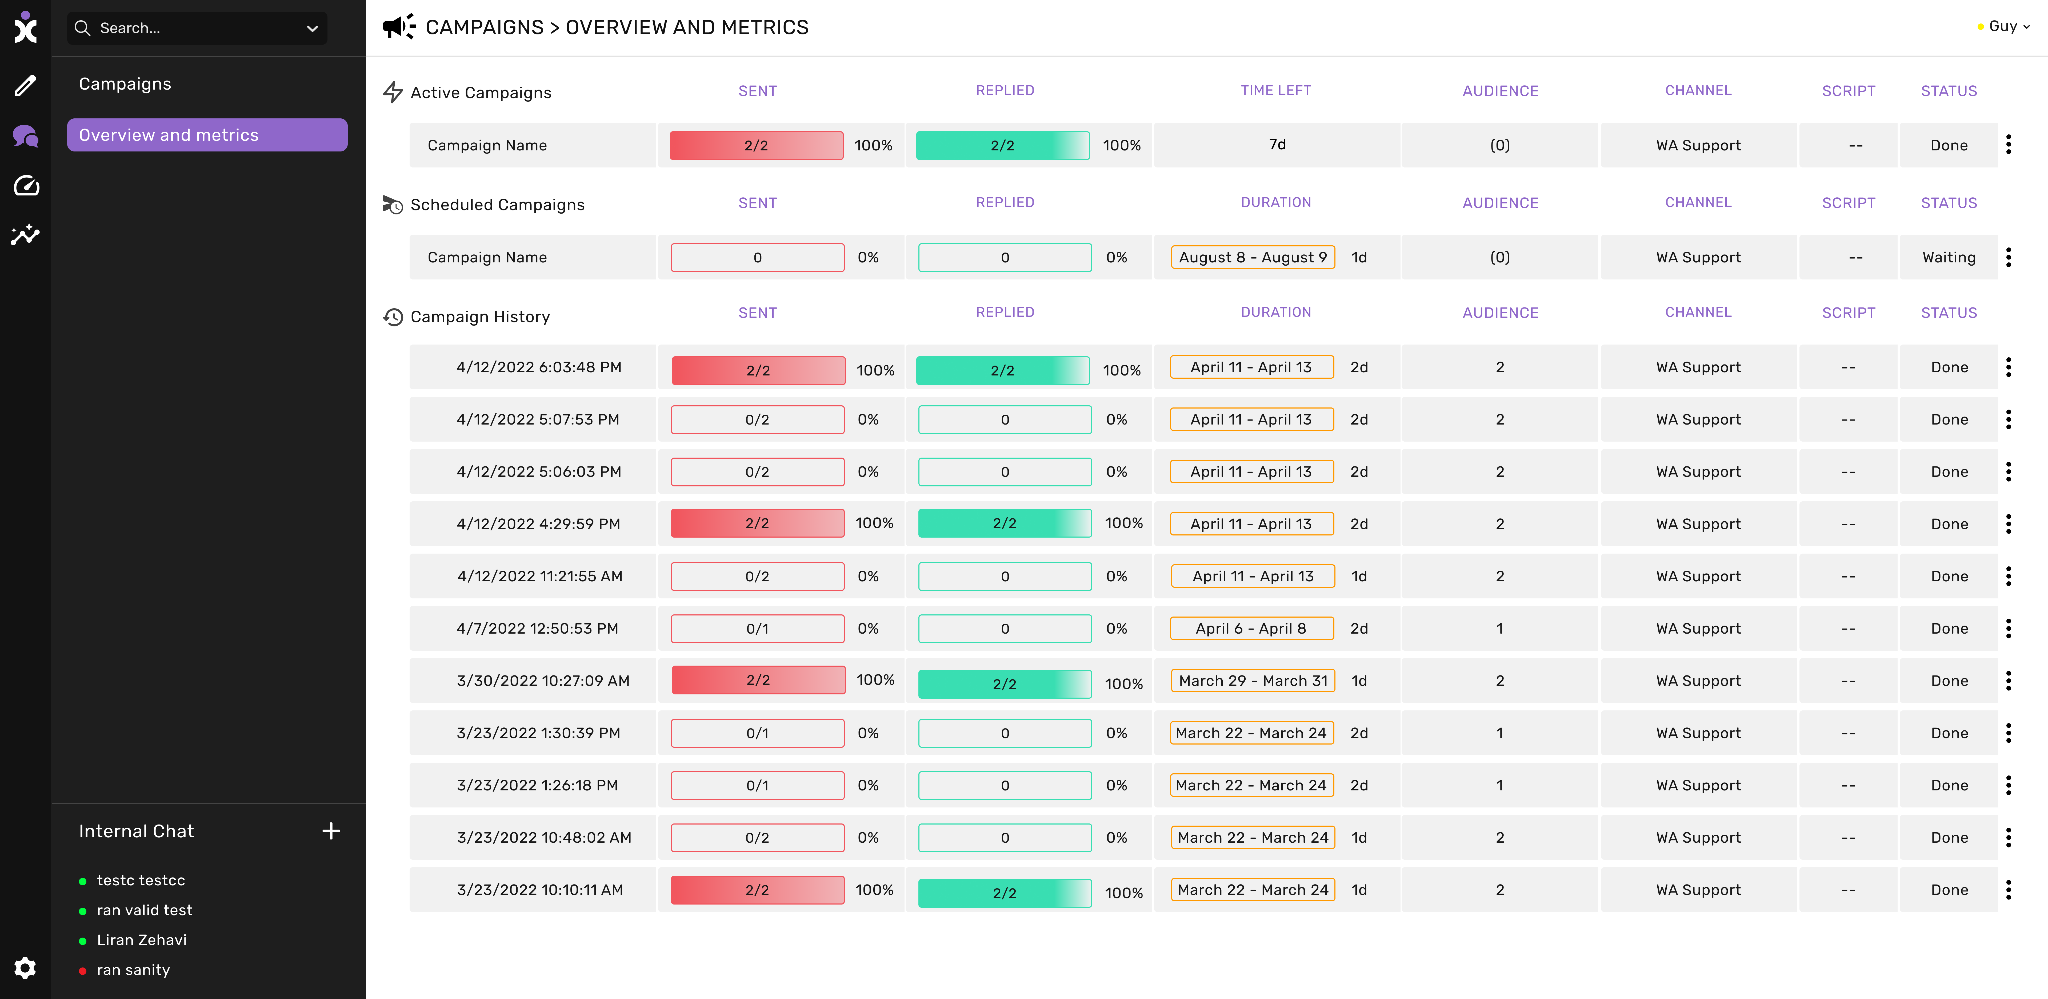
Each Campaign will have a metrics summary, showing:
Name: the name that was given to the campaign (If a name has not been given the time and date of the sending will be the name.
Sent: The number of Message Templates that were effectively sent.
Replied: The number of customers who replied to the campaign.
Time left: The amount of time the campaign has left to be active (Not expired).
Duration: the amount of time that campaign was live (from the first message sent to the expiration time).
Audience: The name of the save audience (if it exists) and the amount of customers it represents.
Channel: The name of the channel the campaign was sent in.
Script: the name of the script that is connected to campaign responses.
Status: the status of the Campaign. These include:
- Done – sending is completed
- Scheduled – Sending time is scheduled
- Canceled – the campaign was canceled before it was completed.
